What is the Tarantula i3 3D Printer Kit?
The Tarantula i3 3D Printer Kit is a popular and affordable option for those looking to get into 3D printing. This kit offers a DIY experience, allowing users to assemble their own printer and learn the intricacies of 3D printing technology. The “i3” in its name refers to the printer’s design, a variant of the Prusa i3, known for its ease of assembly and relatively open-source nature. This design uses a Cartesian coordinate system for movement, making it a common and well-understood type of 3D printer. Buying a kit provides a hands-on opportunity to understand the components and how they work together, offering a great entry point for hobbyists, educators, and anyone curious about additive manufacturing. Building a 3D printer from a kit fosters a deeper understanding of the technology and can lead to more effective troubleshooting and customization down the line.
Components of the Tarantula i3 3D Printer Kit
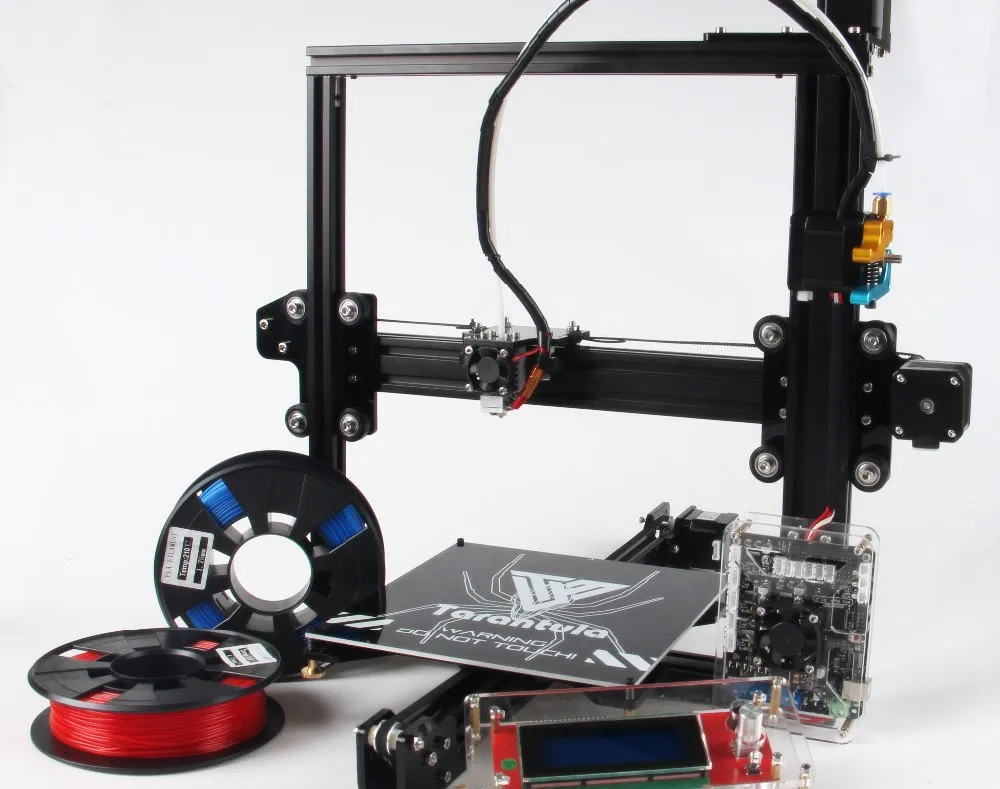
The Tarantula i3 kit typically includes a variety of components, each playing a crucial role in the 3D printing process. These components generally include a frame (often made from aluminum extrusions), a heated bed, an extruder (which melts and deposits the filament), a hot end (the nozzle), stepper motors to drive the axes, belts and pulleys for motion control, endstops to define the print volume, a control board to manage the printer’s functions, a power supply, and various connecting wires, screws, and tools. Filament, the material used for 3D printing, is usually purchased separately. The quality of these components will affect print quality and reliability. Understanding these parts is key to successful assembly and operation. The kit should provide all the necessary hardware, but it’s a good idea to double-check the inventory against a parts list before starting.
Unboxing and Inventory Check

Upon receiving your Tarantula i3 3D Printer Kit, the first step is unboxing and conducting a thorough inventory check. Carefully unpack all the components and compare them to the parts list provided in the manual. This ensures that you have all the necessary items to complete the assembly process. Organize the components, separating screws, nuts, and other small parts into labeled containers. This organizational strategy will save time and reduce frustration during assembly. Check for any missing or damaged parts and contact the seller immediately if any issues are found. Taking the time to do this initial inventory check is crucial for a smooth assembly experience and preventing delays later in the process. This also gives you an initial familiarity with the components you will be working with.
Preparing the Frame and Base
The frame and base form the structural foundation of your 3D printer. Assemble the frame according to the instructions provided in the manual, typically using the aluminum extrusions and corner brackets. Ensure all screws are tightened securely to create a stable platform. The base often houses the heated bed, power supply, and control board. Carefully mount these components to the base, following the provided diagrams and instructions. Pay attention to the orientation of the components and the routing of the wires to prevent interference. A well-constructed frame is essential for print quality, as it provides stability and minimizes vibrations during operation. Proper frame construction will greatly impact the accuracy and reliability of your prints. Check for any wobble or instability in the frame before moving to the next assembly stage, as this will need to be addressed before continuing.
Assembling the X-Axis
The X-axis is the horizontal axis that moves the print head back and forth across the bed. Assemble the X-axis carriage, which holds the hot end and extruder, and mount it on the linear rods or rails. The assembly involves attaching the linear bearings, belts, and pulleys. Ensure that the belts are properly tensioned to prevent slipping and ensure accurate movement. The smooth movement of the X-axis is critical for print accuracy. Adjust the belt tension, and ensure that the carriage moves freely along the rods or rails without binding or excessive play. Precise alignment is vital at this stage to maintain the accuracy of your prints. Proper alignment avoids layer shifting and other printing defects. Regularly check that all screws are tightened and secure. Any play in the system can lead to issues during printing.
Assembling the Y-Axis
The Y-axis controls the movement of the heated bed, moving it forward and backward. Attach the Y-axis motor, belts, and pulleys to the frame and the heated bed carriage. Proper alignment and belt tensioning are crucial for smooth and accurate movement. The bed should move smoothly along the axis without any binding. Make sure the belt is taut but not overly tight, which could cause premature wear on the motor or bearings. Ensure the heated bed is securely mounted and that it doesn’t wobble. The Y-axis’s performance affects the overall quality of the printed object’s foundation, so careful assembly is necessary. Inspect the movement throughout its entire range, ensuring that the bed moves without obstruction. Check the screws frequently, because any issue here can seriously affect the quality of the prints.
Installing the Z-Axis
The Z-axis controls the vertical movement of the print head, allowing it to move up and down. Typically, this involves installing threaded rods or lead screws that are driven by stepper motors. Attach the Z-axis motors and connect them to the appropriate couplers and rods. Ensure that the Z-axis rods are straight and correctly aligned to the frame. Proper alignment and smooth movement are critical for layer adhesion and print quality. Adjust the Z-axis movement, and ensure it goes up and down smoothly without binding or resistance. This axis is fundamental to creating the layers of the 3D printed object. Carefully calibrate the Z-axis at the end of the installation process. Ensuring that the print bed is at the right height ensures the print sticks to the bed, and each layer of filament bonds properly.
Wiring the Electronics
Wiring the electronics is a crucial step, connecting all the motors, endstops, the heated bed, and the hot end to the control board. Follow the wiring diagrams carefully to ensure that everything is connected correctly. Double-check the polarity of the connections to avoid damaging the components. Secure the wires to prevent them from interfering with the moving parts of the printer. Use cable ties or wire management tools to keep the wiring neat and organized. Incorrect wiring can lead to malfunctions, short circuits, or even damage to the printer. Ensure proper insulation of all connections. Verify that all wires are securely connected before powering on the printer. This is a meticulous step that requires careful attention to detail to prevent short circuits and other problems. Improper wiring can result in the failure of the printer or even a fire hazard, so be very careful.
Connecting the Motors

Connecting the stepper motors to the control board is essential for the printer’s movement. The control board provides power and control signals to the motors, allowing them to move the axes. Refer to the manual or the control board documentation to identify the correct motor connectors for each axis (X, Y, Z, and Extruder). Make sure to connect the motors in the proper orientation and that the wiring is secure. Incorrect wiring can result in the motors moving in the wrong direction or not moving at all. Check for loose connections. Proper motor connection and configuration are critical for smooth and accurate movement. This step often involves setting motor current limits on the control board to prevent overheating. When connecting the motors, check and double-check to ensure they are connected to the correct ports and are wired correctly. Without these connections, the printer will not be able to function.
Connecting the Endstops
Endstops are small switches that determine the limits of the printer’s movement. They tell the printer when an axis has reached its minimum or maximum position. Install the endstops on each axis (X, Y, and Z) in the correct locations, and connect them to the control board. Ensure that the endstops are properly triggered when the axes reach their limits. Proper endstop configuration prevents the printer from moving beyond its defined print volume, which could cause damage. These switches help to determine the origin points of the X, Y, and Z axes. The printer needs these to know its location. The endstops are a safety feature, and they help calibrate the printer. They are often overlooked but are essential for proper printer operation. Proper configuration prevents collisions and ensures accurate printing.
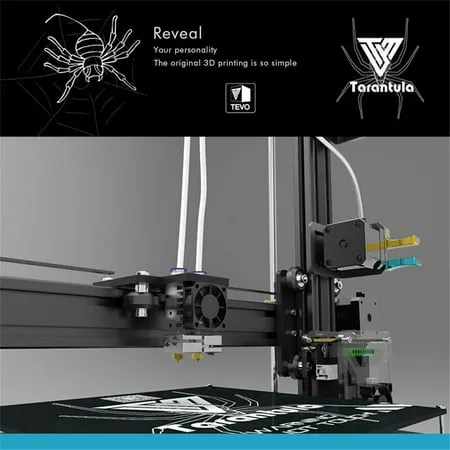
Installing the Extruder
The extruder is responsible for melting and feeding the filament into the hot end. Install the extruder assembly on the X-axis carriage, and connect the extruder motor and the hot end heater cartridge and thermistor to the control board. Make sure the hot end is properly assembled, and that there are no gaps. Proper hot end assembly and calibration are critical for preventing clogs and ensuring consistent filament extrusion. The extruder is a crucial part of the process. The filament should be able to be pushed through the nozzle. Ensure that the extruder assembly is securely mounted and that the filament path is clear. The hot end temperature must be monitored and controlled to achieve the right filament melt.
Bed Leveling and Calibration

Bed leveling and calibration are essential steps to ensure that the first layer of your print adheres properly to the print bed. There are different bed leveling methods (manual, assisted, or automatic). Use the appropriate method for your printer to level the bed. Adjust the bed height at each corner until the nozzle is at the correct distance from the bed surface. Proper bed leveling is essential for print quality and prevents the printed object from detaching from the bed during printing. Calibrate the Z-offset to ensure that the nozzle is at the correct height above the bed. Take time to accurately level your bed, because it’s one of the most critical steps. Leveling ensures that the first layer adheres correctly. Use a piece of paper for manual leveling. Proper bed leveling and calibration significantly improve print quality and reduce print failures.
Software Setup and Slicing
Before you can start printing, you need to set up the necessary software, including a slicer program (such as Cura, PrusaSlicer, or Simplify3D). Install the slicer software on your computer and configure it for your Tarantula i3 printer. Load a 3D model into the slicer and adjust the settings (layer height, infill, print speed, etc.) to suit your printing requirements. The slicer converts the 3D model into G-code, which the printer interprets to control the printing process. Familiarize yourself with the various slicer settings and experiment with different settings to optimize your prints. The slicer is used to configure your printer for the particular task, and its parameters determine the printed object’s quality. Slicing and software setup are critical steps in the process. Good slicing makes prints that work.
First Print & Troubleshooting
After assembling your printer and setting up the software, you’re ready to make your first print. Choose a simple test model (like a calibration cube) and load the G-code file onto the printer. Heat the bed and the hot end to the recommended temperatures. Monitor the first layer carefully to ensure that it adheres properly to the bed. If the first layer doesn’t stick, adjust the bed leveling or Z-offset. Once you get the hang of it, you can experiment with more complex designs. Be prepared for troubleshooting, as you may encounter issues. Common problems include bed adhesion, warping, stringing, and nozzle clogs. Research and experiment to identify and solve these issues. First prints are exciting. Be prepared for possible issues, and start with a simple model. Understanding and resolving these problems is an integral part of the 3D printing experience, so embrace the learning curve.
Post-Assembly Maintenance

Proper maintenance is crucial to keep your Tarantula i3 3D printer running smoothly and to extend its lifespan. Regularly clean the print bed and the hot end. Check and tighten the belts and screws as needed. Lubricate the moving parts (linear rods, bearings) with appropriate lubricants. Inspect the wiring and electrical connections for wear and tear. Regularly update the firmware on the control board to benefit from bug fixes and performance improvements. Regularly clean your printer and keep it in good condition. Following these maintenance tips will keep your printer in top condition. Proper maintenance includes regular cleaning and inspection of all components. Taking care of your printer, you will ensure its long life and maintain print quality. Maintenance will ensure your printer’s long-term reliability and optimal performance.